 Reviews


DIY Installation Tips for Rubber Flooring: A Step-by-Step Guide
Share
Are you considering installing rubber flooring in your home or office? Rubber flooring is a versatile and durable option that can provide many benefits, such as comfort, safety, and easy maintenance. If you're ready to take on the challenge of installing rubber flooring yourself, we've got you covered with this step-by-step guide. Follow these tips to ensure a successful DIY installation.
1. Prepare the Subfloor
Before you begin installing rubber flooring, it's important to prepare the subfloor properly. Start by cleaning the subfloor thoroughly to remove any dirt, dust, or debris. Make sure the subfloor is dry and level. If there are any cracks or uneven areas, fill them in and smooth them out. A smooth and clean subfloor will ensure a smooth and long-lasting rubber flooring installation.
2. Measure and Cut the Rubber Flooring
Measure the dimensions of the room accurately to determine the amount of rubber flooring you'll need. It's always a good idea to add a few extra inches to your measurements to account for any mistakes or irregularities. Once you have the measurements, use a sharp utility knife or a rubber flooring cutter to cut the rubber flooring to the desired size. Take your time and make precise cuts to ensure a perfect fit.
3. Apply Adhesive
Apply a suitable adhesive to the subfloor using a trowel or a roller. Follow the manufacturer's instructions for the specific adhesive you're using. Make sure to apply the adhesive evenly and avoid applying too much, as it can cause the rubber flooring to buckle or warp. Allow the adhesive to set for the recommended amount of time before proceeding to the next step.
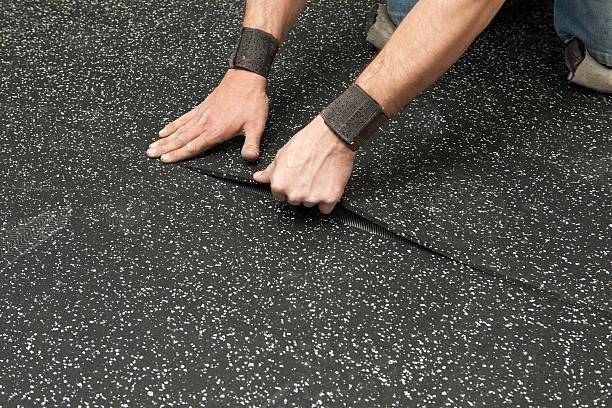
4. Install the Rubber Flooring
Starting from one corner of the room, carefully lay the rubber flooring onto the adhesive. Press down firmly to ensure proper adhesion. Use a roller to smooth out any air bubbles or wrinkles. Continue this process until you have installed the rubber flooring in the entire room. If necessary, use a straight edge and a utility knife to trim any excess rubber flooring along the edges or around obstacles.
5. Allow the Flooring to Set
After installing the rubber flooring, it's important to allow it to set and bond with the adhesive. Follow the manufacturer's instructions for the recommended curing time. Avoid walking on the flooring or placing heavy objects on it until it has fully set. This will ensure a strong and long-lasting installation.
6. Clean and Maintain
Once the rubber flooring has set, it's time to enjoy your new floor. Regularly clean the rubber flooring using a mild detergent and a soft mop or cloth. Avoid using harsh chemicals or abrasive cleaners, as they can damage the rubber. Additionally, periodically inspect the flooring for any signs of wear or damage and address them promptly to maintain the longevity of your rubber flooring.
By following these DIY installation tips, you can successfully install rubber flooring in your space. Remember to take your time, follow the instructions carefully, and prioritize safety. If you're unsure about any step of the installation process, don't hesitate to consult a professional for assistance. Enjoy the benefits of your new rubber flooring!